This guide is an introduction and starting to the Contact Form 7 plugin for WordPress. Basic knowledge of WordPress administration is required. With various examples, this tutorial explains how to display a form on your page and customize your forms and mail.
Download Contact Form 7
You can search for the plugin name on your WordPress dashboard > plugins > add new < or download the plugin files on WordPress.org. All Visualmodo WordPress themes are up for better contact form plugin usage and also offer unique contact form creation and show options.
Displaying a Form
Let’s start with displaying a form on your page. But, first, open the ‘Contact’ > ‘Contact Forms’ menu on your WordPress administration panel. You can manage multiple contact forms there.

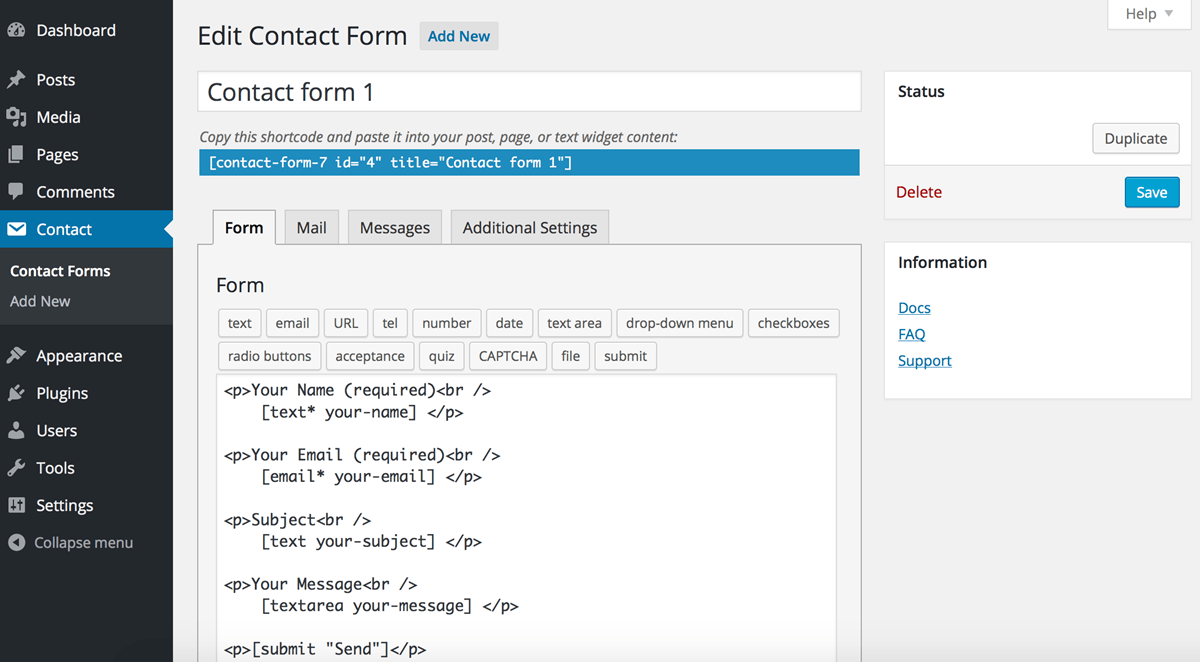
Just after installing the Contact Form 7 plugin, you’ll see a default form named “Contact form 1” and a code like this:
[contact-form-7 id="1234" title="Contact form 1"]
Copy this code. Then, open the edit menu of the page (‘Pages’ > ‘Edit’) into which you wish to place the contact form. A popular practice is creating a page named “Contact” for the contact form page. Then, paste the code you copied into the contents of the page.
Now your contact form setup is complete. Visitors to your site can now find the form and start submitting messages to you.
Next, let’s see how you can customize your form and mail content.
Customizing a Form
You may feel that the default form is too simple for you and want to add more fields. Then, you can edit the form template in the admin screen and add other areas.
Make tags and insert them into the ‘Form’ field to add fields to a form. You’ll find unfamiliar codes in the ‘Form’ field, for example, [text* your-name]. These codes are under the name of “tags” in the vocabulary for Contact Form 7.
A tag has a rather complex syntax, but don’t worry! You don’t have to learn it. Instead, you can use the “Generate Tag” tool to generate as many tags as possible.
Moreover, the second word in the tag is its name. For example, the name of [text* your-name] is ‘your-name.’ This name is essential as it is used later in your mail template.
Customizing Mail: Starting With Contact Form 7 WordPress Plugin
You can edit mail templates in the ‘Mail’ field set as you did with the form template. You can also use tags there, but note that tags for mail are different from those for forms.
Secondly, tags you can use in a mail template contain only one word in brackets and look like [your-name]. You should be aware that this ‘your-name’ is the same as the name of the form tag. So, which is noted in the previous example. The two labels correspond with the same name.
Finally, in the mail, [your-name] will be replaced by the user’s input value, which is submitted through the corresponding form field, which, in this case, is [text* your-name].