Often times during troubleshooting, many sites will recommend deactivate all plugins and activate them one by one. What’s worst is sometimes you get locked out of your WordPress admin panel, so you can’t even deactivate the plugins in an easy way. If you have ever faced the white screen of death, then you know exactly what we are talking about. In this article, we will show you how to deactivate all WordPress plugins when not able to access wp-admin area.
There are two methods to disabling your plugins. One requires you to use FTP, and the other requires you to use phpMyAdmin.
Deactivate All Plugins Using FTP
In this method, you will need to either use an FTP client, or your host’s file manager. If you haven’t used FTP before, then you may want to see how to use FTP to upload files to WordPress.
First, you need to connect to your website using an FTP client, or File Manager in cPanel. Once connected, you need to navigate to the /wp-content/ folder.
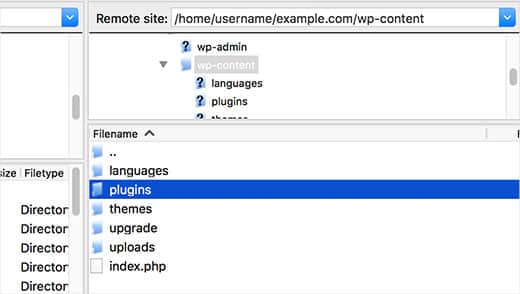
Inside wp-content folder, you will see a folder called plugins. This is where WordPress stores all plugins installed on your website.
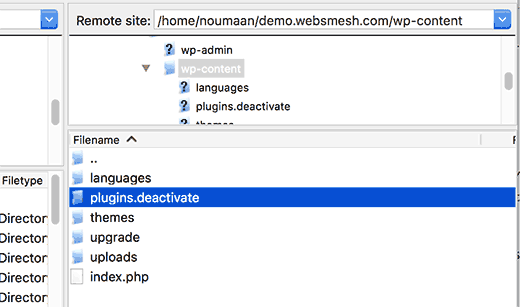
Right-click on the plugins folder and select Rename. Change the name of the plugins folder to anything that you like. In our example, we will call it “plugins. deactivate”. Once you do this, all of your plugins will be deactivated.
Usually, this method is used when you are locked out of your admin area. If the issue was with your plugins, then you should be able log in to your WordPress admin area.
Once you do that, go back to your /wp-content/ folder and rename “plugins. deactivate” back to plugins. Now you can activate one plugin at a time until your site breaks again. At this point, you will know exactly which plugin caused the issue.
Deactivate all plugins using phpMyAdmin
The FTP method is definitely easier in our opinion, however you can also deactivate all plugins using phpMyAdmin.
Firstly, you will need to log in to your web hosting dashboard. In this example, we are showing you a cPanel dashboard. Your hosting account’s dashboard may look different.
You will need to click on the phpMyAdmin icon under the ‘Databases’ section.

This will launch phpMyAdmin in a new browser window. You will need to select your WordPress database, if it is not already selected. Secondly, you will be able to see WordPress database tables.
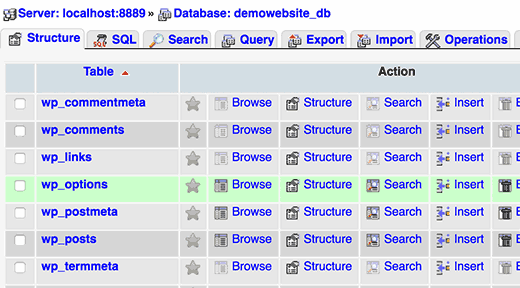
As you can see that all tables in the database have wp_ prefix before table name. Your tables may have a different prefix.
You need to click on the wp_options table. Inside wp_options table you will see rows of different options. You will need to find the option ‘active_plugins’ and then click on the ‘Edit’ Link next to it.

On the next screen, you will need to change the option_value field to a:0:{}and then click on Go button to save your changes.
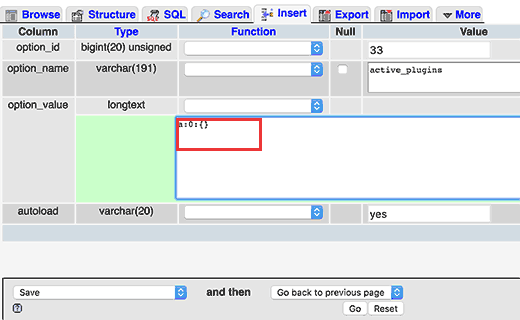
That’s all, you have successfully deactivated all WordPress plugins using phpMyAdmin. If it was a plugin stopping you from accessing the WordPress admin area, then you should be able to log in now.
We hope that this article helped you deactivate all plugins in WordPress.
Source http://www.wpbeginner.com/