Edit WordPress Navigation Menu
In this guide and tutorial, you'll learn how to add, edit and customize a WordPress website navigation header menu to setup a navbar. Edit…

In this guide and tutorial, you’ll learn how to add, edit and customize a WordPress website navigation header menu to setup a navbar.
Edit WordPress Navigation Menu

In this tutorial on Visualmodo knowledge base, we will show how to Create Custom header menus and header more with our WordPress themes.
Before starting the edit of your WordPress navigation menu, you need to;
Have a logo uploaded on your site, as is shown in this tutorial here.
Have some pages built into your site (to populate and be used as ‘menu items’) and need a WordPress ‘main menu’ already set.
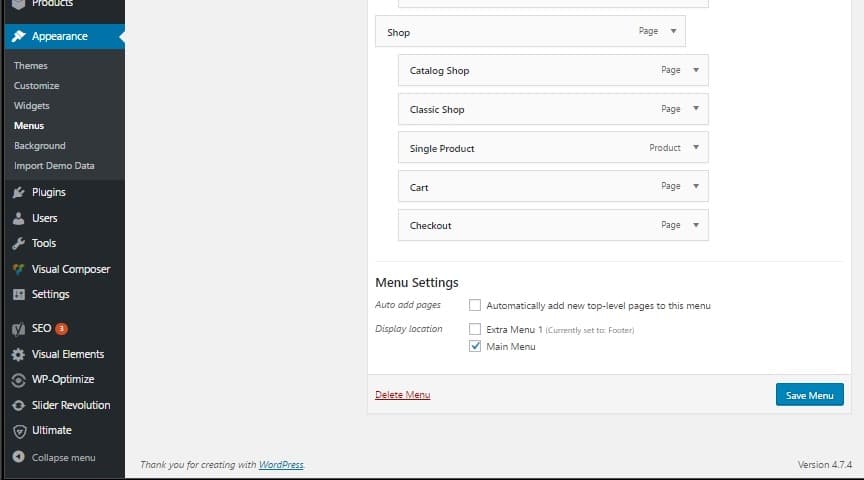
To set up a header navigation menu, go to WP > DASHBOARD > APPEARANCE > MENUS < Create a new menu, name it, and add some pages on the menu before saving the menu, make sure you set it as ‘Main Menu’ as is shown on the attached image below.
How to add or remove icons from the navigation menu?

Navigate to your WordPress dashboard > Visualmodo > theme options > header > In this area, you will see options for set as ON or OFF in the options for showing WooCommerce shop cart icon and search icon.
You also can have a side menu icon on the navigation to open another menu. For more information about this icon and its usage, please see this tutorial Side Menu Area / Side Navigation.
How to set a full-width navigation menu?
Navigate to your WordPress dashboard > Visualmodo > theme options > header > style < and select the option on ‘Boxed or Stretched Style*.’

You can change your menu size, hover, and active menu item colors in this area by selecting the ‘Link Color Style’ for the ‘background link.’
How to change navigation menu colors?
Navigate to your WordPress dashboard > Visualmodo > theme options > colors > Header <, and you will see the options to set up your header colors. You also can set more colors on theme options > colors > select ‘custom color’ on ‘color mode.’
How to change fonts? Edit WordPress navigation menu
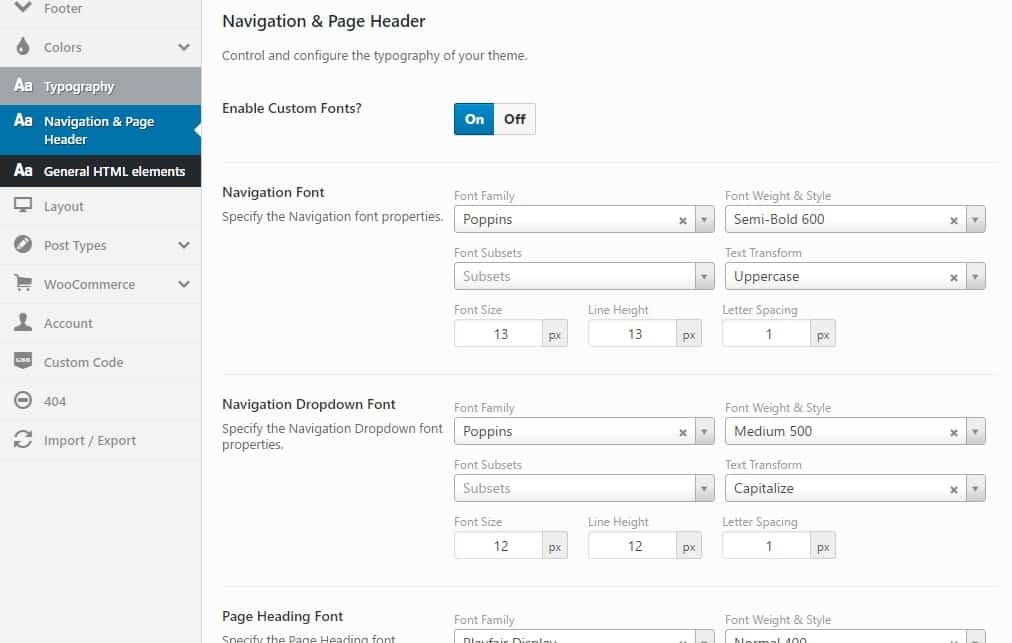
Navigate to your WordPress dashboard > Visualmodo > theme options > colors > Typography < and you will see the options to set up your header fonts in aspects you want for your sites, like sizes, style, height, spacing, fonts, and much more.
Please set the first options as ON in ‘enable custom fonts’ before anything.
How to keep the header menu fixed while the page scrolls down? (Sticky menu)
Navigate to your WordPress dashboard > Visualmodo > theme options > and set it as ON in the ‘Fixed Navigation’ option. To finish, click the ‘Save Changes button, and all is done. In addition, follow this tutorial for extra possibilities. Follwo this guide to add and customize WordPress header.
Organizing WordPress website navbar menu
- Access the WordPress Dashboard: Log in to your website and go to the admin area.
- Navigate to the Appearance Menu: In the WordPress Dashboard, find the “Appearance” tab on the left-hand side and click on it. This will expand the list of options.
- Select Menus: From the expanded options under “Appearance,” click on “Menus.” This will take you to the menu editor.
- Create a New Menu: If you haven’t created a menu, click the “Create a new menu” link. Give your menu a name and click the “Create Menu” button.
- Add Menu Items: On the left side of the menu editor, you will see various sections like Pages, Posts, Custom Links, etc. You can expand these sections to view their items. Select the items you want to add to your menu by checking the corresponding checkboxes and clicking the “Add to Menu” button. You can also reorder the items by dragging and dropping them within the menu.
- Configure Menu Settings: You can configure additional settings once you’ve added the desired items to your menu. For example, you can choose a location for the menu (theme-dependent) and enable the “Primary Menu” option. Depending on your theme, you may also have opportunities to set a specific style or appearance for your menu.
- Save the Menu: After arranging your menu items and configuring the settings, click the “Save Menu” button to save your changes.
- Preview and Test: Visit your website’s front end to see how the menu appears. Test the navigation to ensure the links work correctly and the menu is organized as you intended.
- Edit and Update as Needed: You can always return to the menu editor to make changes or add new items. Repeat the steps mentioned above to modify your menu.
How to Add Images & Icons On Navigation Menus in WordPress For Free?
How to Add Navigation Menu Title Attributes in WordPress – Video Tutorial
How To Call Different Navigation Menus In Specific WordPress Pages?
How to Add a Mega Menu on Your WordPress Site Navigation For Free?
Edit WordPress Navigation Menu – Visualmodo. I hope this guide and tutorial; you’ll learn how to add, edit and customize a WordPress website navigation header menu to setup a navbar.