Testimonial Elementor Widget of Borderless WordPress Plugin
In this WordPress plugin tutorial, you`ll learn how to use the testimonial widget or element of the Borderless WordPress plugin while using the Elementor…
In this WordPress plugin tutorial, you`ll learn how to use the testimonial widget or element of the Borderless WordPress plugin while using the Elementor website builder, in a simple, fast and effective way.
Firstly, make sure you have the Elementor and Borderless WordPress plugins installed and activated on your site. In addition, it can be the free version of both WordPress plugins. Secondly, go to your WordPress dashboard. Pages. Add new and Edit with Elementor.
Access Testimonial Widget in Borderless WordPress Plugin
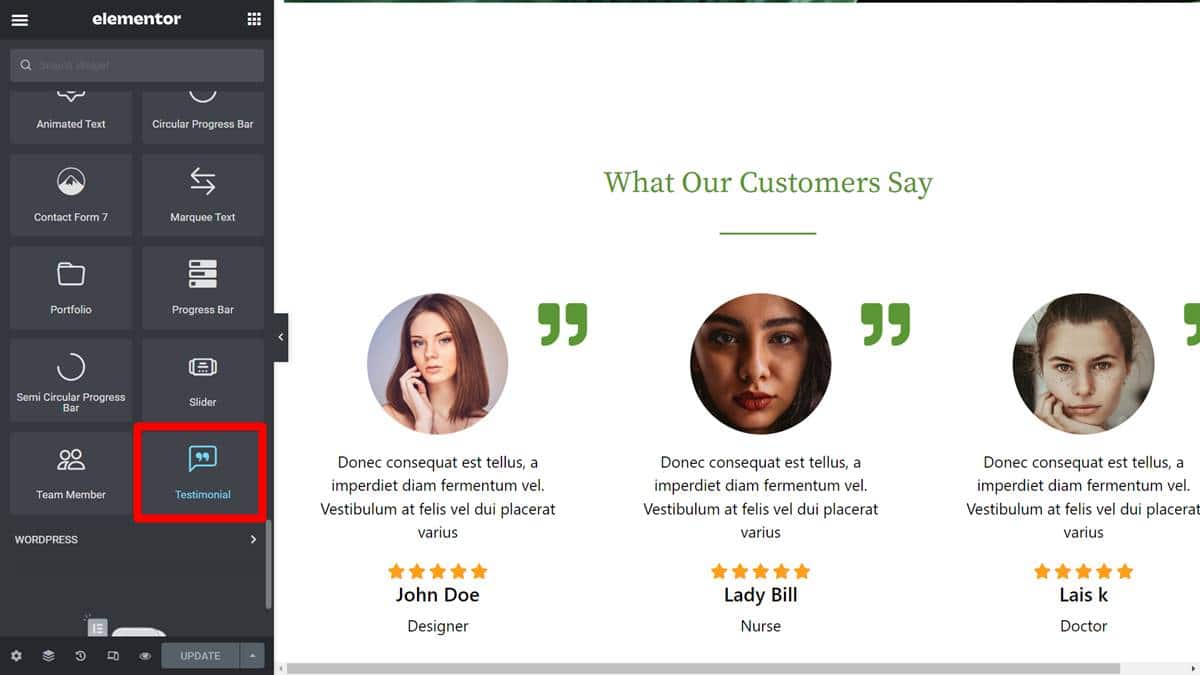
Firstly, make sure you have the Elementor and Borderless WordPress plugins installed and activated on your site. In addition, it can be the free version of both WordPress plugins. Secondly, go to your WordPress dashboard. Pages. Add new and Edit with Elementor. Into the Left sidebar of widgets search for ‘testimonial’ and select the one present in the image below.

Widget Options
After the widget opens, you’ll see a screen where you can see the picture, in addition to the content, and after this, you’ll have options to style the element and to edit the sizes, spacings, and colors of the features. So, with a few clicks on your mouse, you can have a fully functional testimonial section using Borderless WordPress plugin.

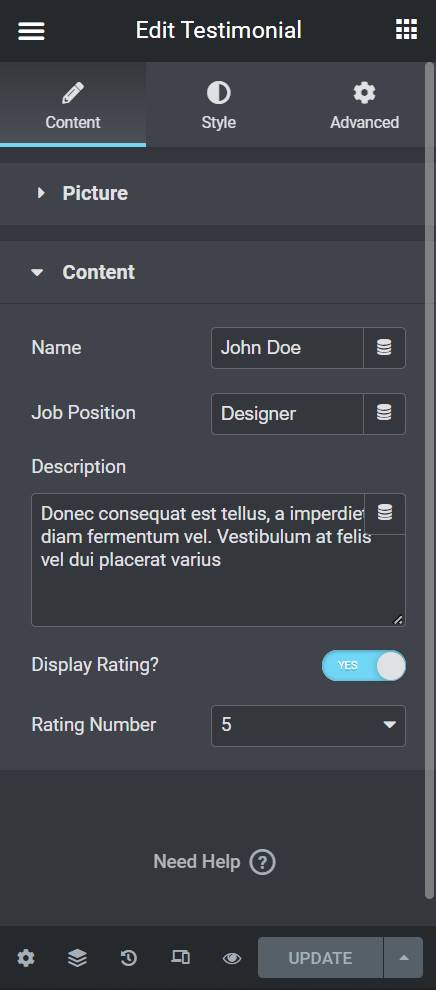


The first step is to upload the person who delivers the testimonial picture (photo) and set the size of this picture. Secondly, you can type the content starting with the name, job position, and description, moreover, you can display a start rating to your testimonial using Borderless WordPress plugin and set the number of starts from 1 to 5. Finally, you can move to the style and to the advanced sets where you’ll be able to fully edit the colors of every single part of your widget, spacings, and sizes too.