WordPress Team Post Type
Guide & tutorial to learn how to create a team members page on your WordPress website using the Visualmodo Post Type and alt options….

Guide & tutorial to learn how to create a team members page on your WordPress website using the Visualmodo Post Type and alt options.
WordPress Team Post Type Usage Guide
In this tutorial on Visualmodo WordPress themes, you will see how to build a WordPress Team Post Type using our articles and our WordPress plugin – Borderless plugin to show your team members.
Before creating a team post on the WordPress site, navigate to Wp Dashboard > Visualmodo > Theme options > Post Types > and develop your team post type, as shown in the attached image below. Several post types (set as 2 or more according to your site style) the name, slug, plural name, and save the changes.
After that, refresh the page to load the new WordPress dashboard ‘Team’ area. (Normally, when you activate the theme on your WordPress, this post type already builds and is present).
WordPress Team Post Type Options Panel


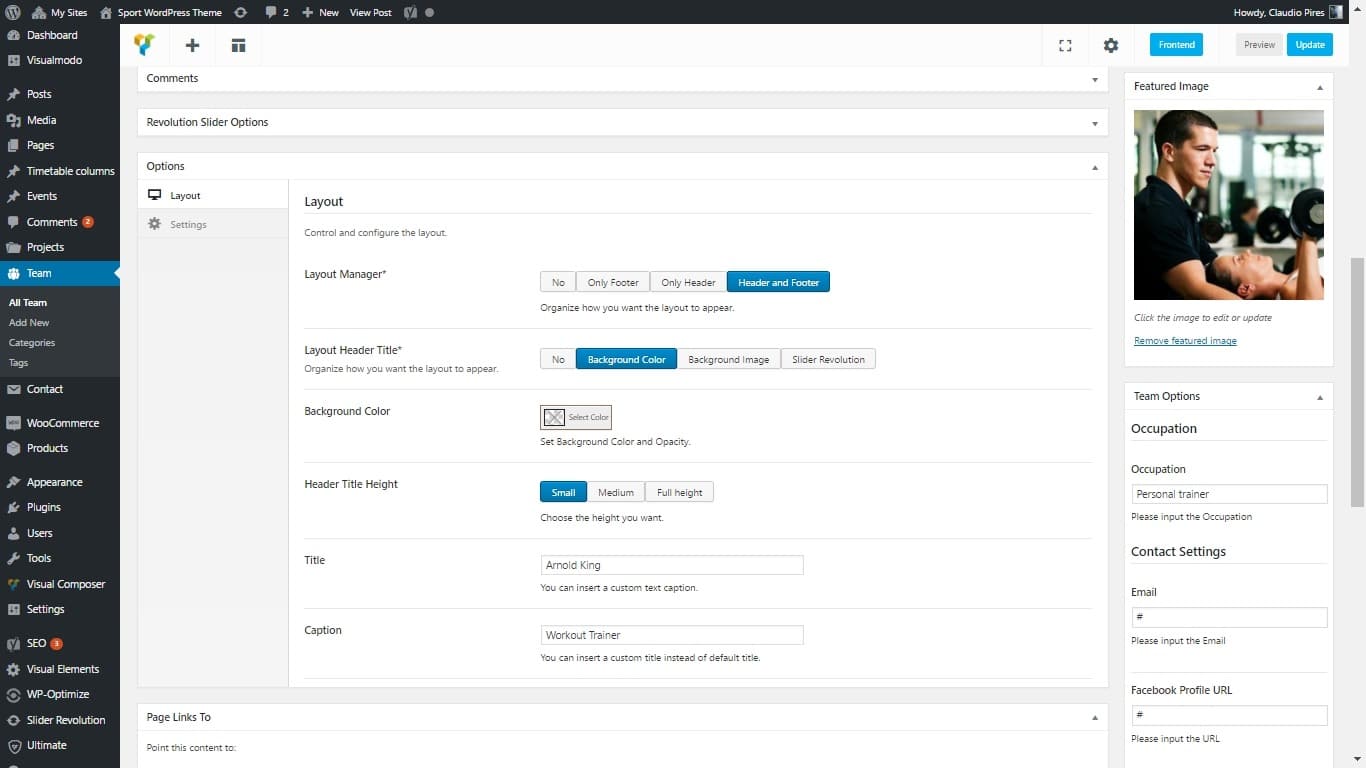
Now is the time to create your team posts. You can write it up just like your design your pages. Using the page builder elements to design any layout you like. Or blog posts, and do not forget to add a featured image on each post before saving.
NOTE: you can edit the team body content area using the visual composer page builder just like you did for your WordPress site pages using the elements. Please look here to enable the visual composer page builder on this team/members editor post type.
In conclusion, ensure you complete the ‘Featured Image’ fields and the social and name fields to display on the posts index page in the area of ‘Team Options.’
How to call/add this team post-type posts on my pages?
After all, you must ensure you have the Visual Elements Plugin activated on your WordPress site. The Visual Elements plugin is a Visualmodo WordPress Plugin that all our clients gain for free.
This plugin will add more elements to your Visual Composer Page builder element (As soon as you activate the Visualmodo theme on your site, you will receive a notification on your WordPress dashboard asking you to click and install this plugin).
To use a team element, log in on your WordPress dashboard and go to your ‘Pages’ area. In this area, find the page where you want to apply this team element and click the ‘edit’ button. In the editor window, you will need to click on Page Builder, and on ‘Add Element’ in a page builder, select the ‘Portfolio’ element, like this one on the attached photo below:
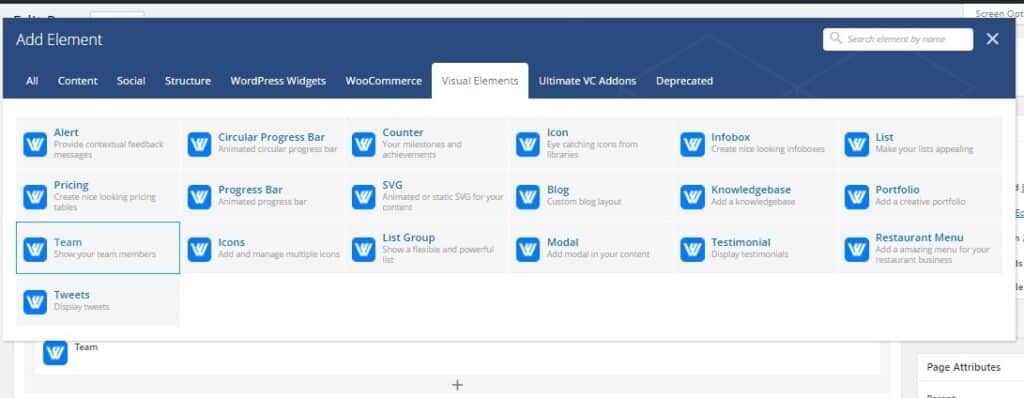
When you select the ‘Portfolio’ element, a window will open to you choosing your portfolio layout. You can apply animation for this element, select the columns layout, and the portfolio items style, remove space between portfolio items, and remove the link to the single portfolio item.
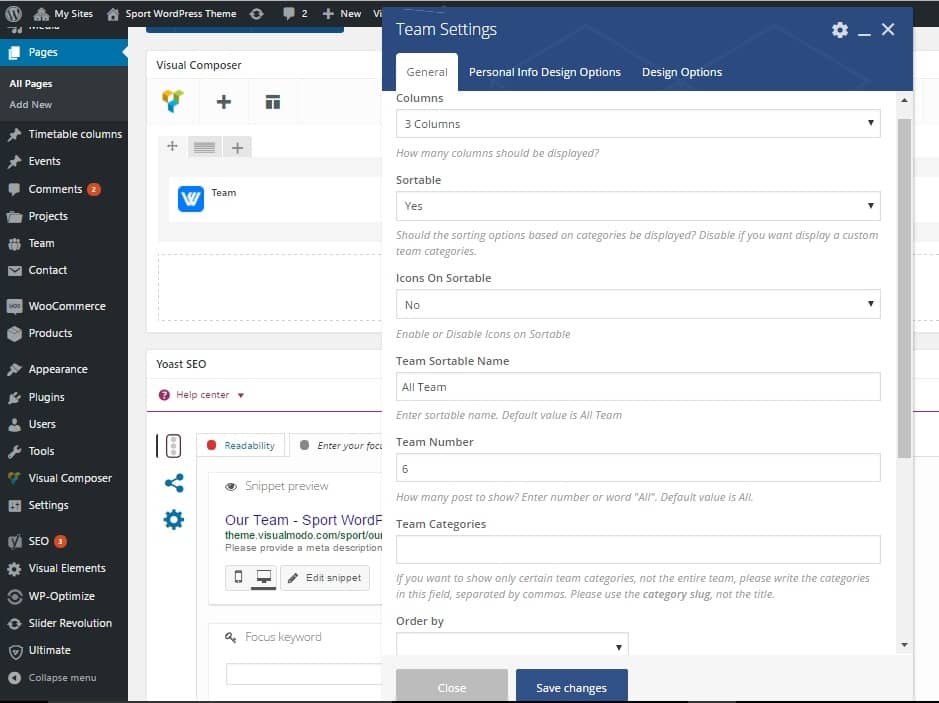
Team page builder element extra options
NOTE: in the case you want your site users to click on an image, it’s open a lightbox with only the image and title.
It would help if you marked the option for removing the link for the single team post item page. In case you don’t keep it, your user will be redirected to the portfolio post page. When clicking on the portfolio item on a page, display mode.
In addition, if you want the filter or not. A title or the filter. The number of posts and the order. After you end your custom, click the ‘Save’ button to apply it on a page.
You also can show your team posts (call the bars) on any page or post on your WordPress site using the Visual Composer ‘Posts Grid’ element or even design your grid system to show your team posts in the way you like, for it, please watch the videos below.
Video Tutorial
WordPress Team Post Type by Visualmodo
Team Element Usage Guide – Ultimate Addons For Bakery Page Builder WordPress Plugin
Learn how to use the Ultimate addons for the WPBakery plugin to create a team members section on your WordPress website following this video tutorial. Watch to learn how to create a team page using it.
How To Create a Team Members Page With Elementor WordPress Plugin Free?
To create a team members page with the Elementor WordPress plugin for free, you can follow these steps:
Install and Activate Elementor Plugin
- Log in to your WordPress dashboard.
- Go to “Plugins” > “Add New.”
- Search for “Elementor” in the search bar.
- Click “Install Now” and “Activate” to activate the plugin.
Create a New Page
- From the WordPress dashboard, go to “Pages” > “Add New” to create a new page.
- Enter a title for your page (e.g., “Our Team”).
Edit the Page with Elementor
- Click the “Edit with Elementor” button to open the Elementor editor.
- You will be presented with a blank canvas or pre-designed templates. Choose your preferred option.
Add a Section
- Click on the “+” icon in the middle of the screen to add a new section.
- Choose the desired structure for your section (e.g., one column, two columns, etc.).
Add the Team Member Widgets
- Click the “+” icon again to add a new widget in the section you created.
- Search for “team member” or “person” in the Elementor widget search bar.
- Drag and drop the appropriate widget onto the section.
Customize the Team Members Widget: Page WordPress guide
- In the widget settings on the left sidebar, you can add the team member’s name, title, bio, photo, and social media links.
- Customize the layout, typography, colors, and other settings according to your preferences.
Repeat Steps 5 and 6 for Additional Team Members
- To add more team members, click on the existing team member widget and duplicate it.
- Modify the duplicated widget’s content and design to reflect the details of the new team member.
Preview and Publish: Team members page WordPress guide
- Click the “Preview” button to see how your team members’ page looks.
- If you’re satisfied, click on the “Publish” button to make the page live on your website.
That’s it! You have created a team members page using the Elementor WordPress plugin for free. You can further enhance the page by adding other elements or customizing the design as per your requirements.