GIMP (GNU Image Manipulation Program) is a free cross-platform image editor software for GNU/Linux, OS X, Windows, and other operating systems. You can change its source code and use it for free as an excellent alternative to Photoshop.
Photoshop transcended being a piece of software to become a verb indicating any kind of image manipulation. The problem is that it costs you money. The cost isn’t quite as extravagant as it was years ago because of Adobe’s Creative Cloud subscription bundles. However, it’s still a decent investment, and many people look for the best Photoshop alternative they can find. Most of the time, that’s the open-source gem GIMP. If the features and tools Gimp offers can’t fully satisfy your needs, but Adobe Photoshop’s cost is still a problem, look through the possible ways to get Photoshop for free and enjoy its image editing capabilities.
What is GIMP?

Before we go any further, understand this: GIMP is not as polished as Adobe Photoshop. If you like open-source software, that should come as no surprise. Getting UX and UI designers to contribute as much as devs is hard. If you want a sleek, polished, ultra-professional, modern experience, head to the Creative Cloud page and subscribe. GIMP ain’t gonna work for you. And that’s cool.
But if you’re not scared away by the simple, functional UI, this Photoshop alternative has a lot of power.
GIMP, short for GNU Image Manipulation Program, is an open-source image editor that you can use on Mac, Windows, or even Linux (which can’t run Photoshop at all). GNU is a type of open-source license that happens to be the same one our dearly beloved WordPress uses.
Download it here, it’s free!
GIMP was first released way back in 1996 (that’s pretty old but not as old as Photoshop’s 1988 debut). Since that original 1996 release, the community surrounding it has steadily grown, and its functionality has exploded. You can even use Photoshop extensions with it.
Beware of Fake Downloads
Just a quick aside here as a warning. Despite how awesome it is, open-source software comes with challenges, and GIMP is no different. Years ago, someone forked the repo for the editor and made a product called GIMPshop that was meant to be “more accessible to the many Adobe Photoshop users out there,” according to the dev.
But let me urge you not to download GIMPshop under any circumstances. First of all, the original fork did not gain updated in years and years, and secondly (and more importantly), some folks with bad intentions have an alternate version of GIMPshop (with the same name GIMPshop) that is chock-full of malware and viruses.
So between an ancient build, dated UI, and bunches of baddies in the code, I urge you to stay away and only download the original and official software from their website.
Getting Started with GIMP (GNU Image Manipulation Program)
GIMP is local software, not cloud-based, so you have to download the installer and set it up on your system. There shouldn’t be any issues with that more than any other program you download.
Just be aware that GIMP has a pretty long load time. In my experience, it’s about 3x what the most up-to-date Photoshop is. Honestly, I don’t think that’s a big deal, but you should know.
Initial UI Using the Free Photoshop
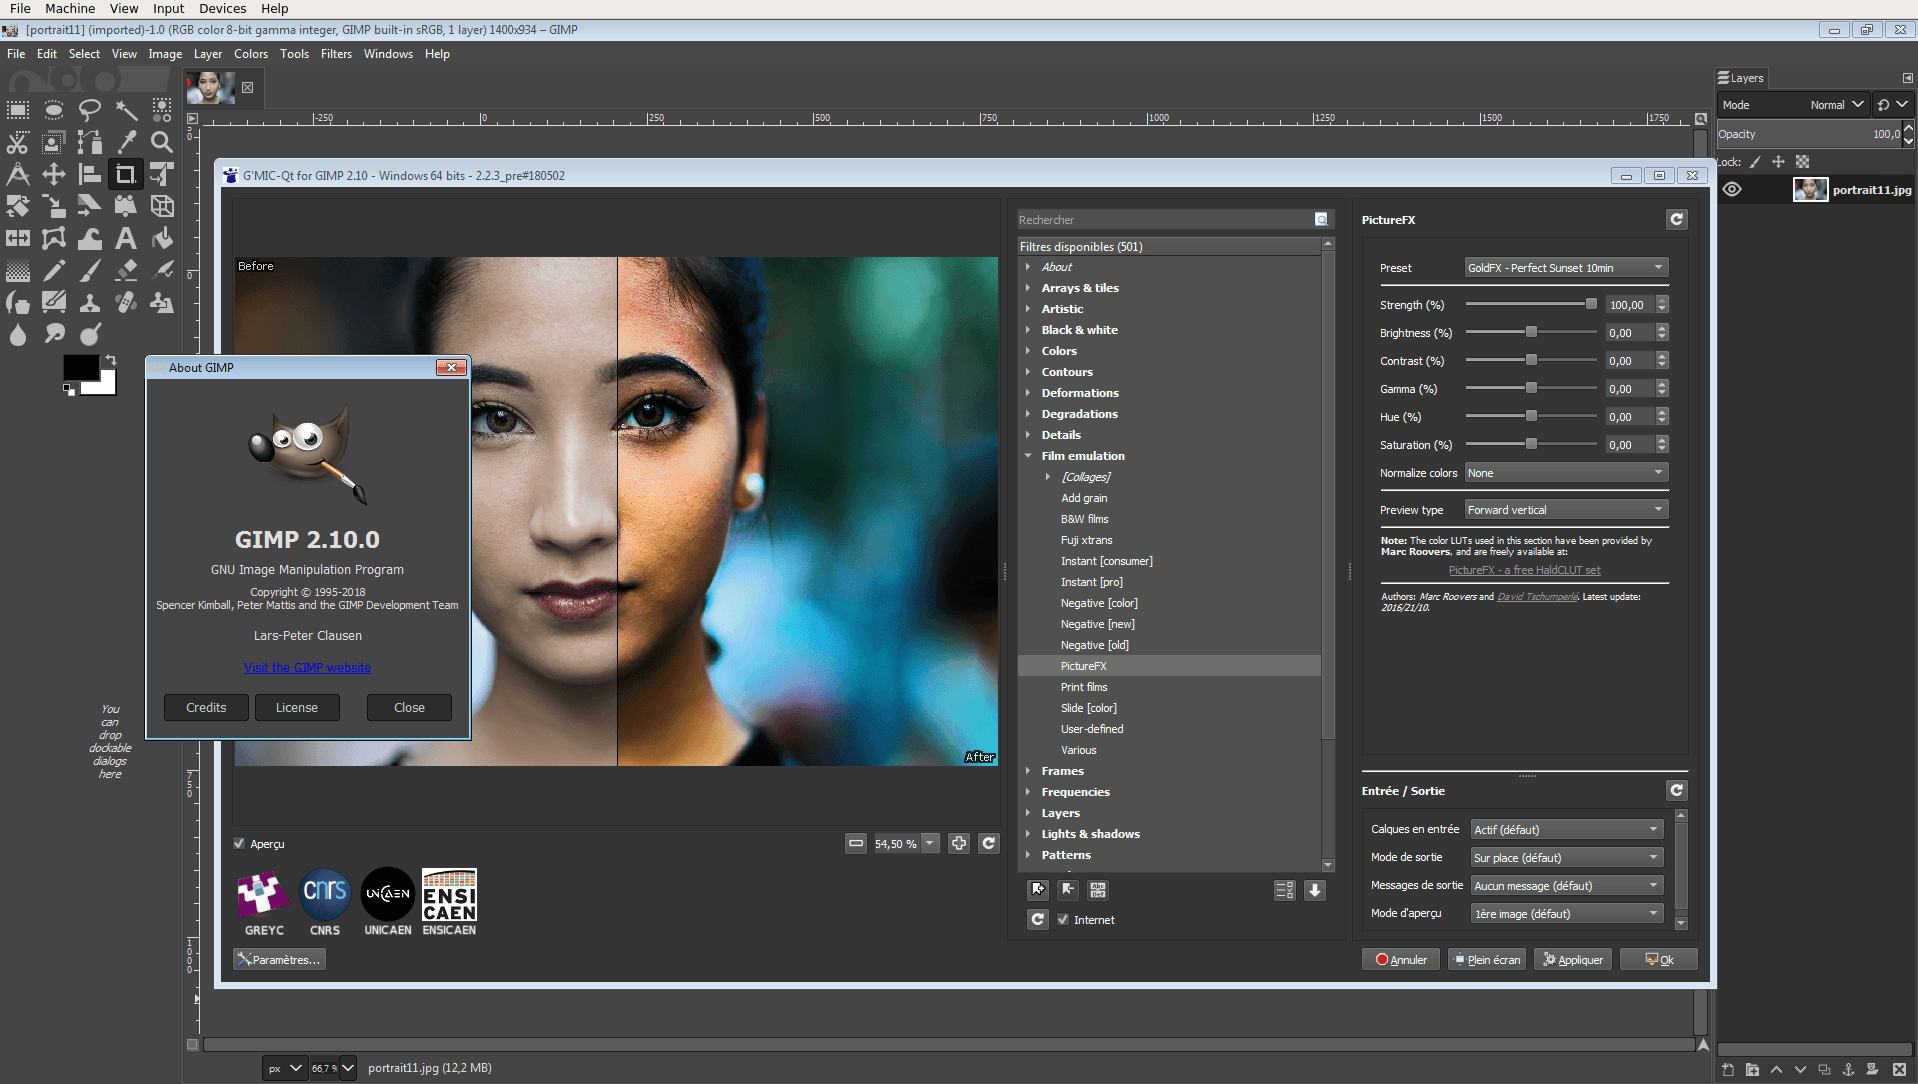
The UI may take some getting to. It’s a multi-window UI, and you can see the difference here from opening up the same image in Photoshop and GIMP.

Don’t be alarmed if you hate the multi-window view. You can change it by going to Windows -> Single-Window Mode. Suddenly, things begin to look a lot more accessible and familiar to Photoshop users.
What Can You Do With GIMP Free Image Editor?
A lot. While you can see the UI doesn’t have the pizzazz of Adobe’s flagship, it has many of the same features. If you’re a Photoshop power user, you might be missing that must-have element. For casual users, it’s more than powerful enough to get nearly any job.
The big differences come in the workflow. GIMP (GNU Image Manipulation Program) doesn’t follow Adobe’s standards for keyboard shortcuts or layout. And many features users find bar is missing from GIMP. That’s not to say you can’t do them. GIMP has an incredibly robust and powerful toolset. But remember that you may be dealing with a series of workarounds.
Exposure, For Instance
For instance, one of my most used tools in Photoshop is darkening the background of an image. Like in the picture above with the Window -> Single-Window Mode highlighted (though the arrow was applied in Snagit).
To do so, you highlight the area you want to highlight, right-click and pick Select Inverse (to select everything except your highlight), then you hit Image -> Adjustments -> Exposure and decide how dark you want the background.
In GIMP, you can’t adjust exposure settings at all. This will come in version 2.9, which is available as a development version for Windows only (sorry, Mac and Linux users).
That said, there’s a kind of workaround for this. You use the Rectangle Select Tool, make your selection, go to the Selection Editor tab and change it to Invert the Selection. Then it’s just Colors -> Desaturate… -> Brightness.
For my needs, it works well. But I am a casual user who makes tutorials. High-end photo editors and graphic designers know that Exposure and Brightness are two entirely different things.
The Basics are the Same(ish)
That said, most of the basic stuff is the same in both, and GIMP performs admirably and holds its own. Over the past few years, GIMP has grown and become much more user-friendly than it ever was before. If you’re off by its learning curve in the past, give GIMP another look.
Honestly, the learning curve is steep for either program, and I think it’s about even now in terms of accessibility. Just keep in mind the principles you learn in one will transfer. The tools and workflow will take some adjustment if you move from one program to the other.
Remember that GIMP Free Image Editor uses different names for most of the tools, too — like Rectangular Marquee Tool and Rectangle Select Tool in the example above. Or Text Tool vs. the Horizontal Type Tool. There’s also Paintbrush vs. Brush, Bucket Fill Tool vs. Paint Bucket Tool, and the Color Picker vs. Eyedropper in Gimp and Photoshop, respectively.
Plus, all the tools, panes, and icons are in different locations and menus.
Plus, GIMP has a normal CMD-Z Undo that just keeps going back through your actions. That means you don’t have to use Photoshop’s awkward CMD-OPTION-Z Step Backward (in PS, CMD-Z only goes one step back and turns into Redo.)
So…Should You Use GIMP Free Image Editor?
Absolutely. If you’ve got an Adobe Photoshop membership already, you don’t have much reason to use GIMP except to play around. But if you’re a casual user who doesn’t need all of the super-advanced features that most of us will never use, GIMP is more than fine for your needs.
GIMP is a fantastic tool that eliminates the need to pay for Photoshop. It’s not a complete replacement, though it’s finally hit the point where it can be used professionally. Probably not for high-end photographers or graphic design power users, but if you’re a blogger or marketer who occasionally tweaks and resizes some images for posts, social media, and email blasts, GIMP may be right up your alley.
Learn the basics
Start the following steps by launching GIMP and dragging it into an empty canvas window. We use the same image for each section. Image scaling/zooming.

Click the “File” tab and import your image by selecting “Open…” (CTRL+O). After the image loads, click the Image tab and select Scale Image from the drop-down menu. A dialog will appear to allow editing. Scale/resize the image using the provided options.
Resize images by width and height or X, Y resolution. Changes can be made in pixels, percentages, centimeters, and more. Note that zooming in on the image may produce a more pixelated image. After adjusting the parameters, click Scale to continue.
File size reduction
Click the File tab and choose Export as… (Shift+CTRL+E) Choose a name and location for the file. Click the “+” next to Choose file type (by extension) to open a list of file types you can save as. Lossy file types like jpg or png are preferred. Next, click the “Export” button to open a new window with options. The less you save, the smaller the image file. Make sure the compression level is set to 9 for the smallest size.

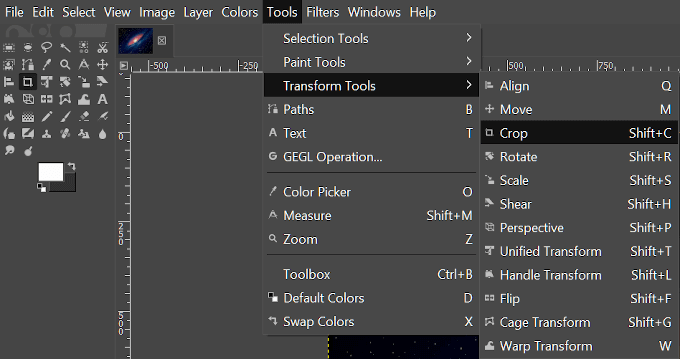
When you have decided which elements of the image you want to save, click Export, crop the image, navigate to the Tools tab and choose Transform > Crop (Shift + C). You can also select the crop tool by clicking the icon in the tool document in the upper left corner of the interface of free photoshop.
Next, while holding the left mouse button, drag the cursor over the area you want to create as the final image. Once determined, all parts of the image other than the selected part will be dimmed, while the part set as the final image will remain unchanged on the image free editor.
You can use the box’s corners to adjust the area by dragging with the mouse to shrink or expand it. Once you have the desired image, left-click on it or press Enter.
How do you feel that GIMP compares to Photoshop?