Adding Widgets on WordPress Top Header
Guide & tutorial to learn how to use WordPress widgets, create and start adding blocks to website top header navbar section in a simple…
Guide & tutorial to learn how to use WordPress widgets, create and start adding blocks to website top header navbar section in a simple method.
Adding Widgets on WordPress Top Header

In this tutorial on Visualmodo knowledge, we will add widgets to WordPress top header section or a navigation menu and change its layout structure.

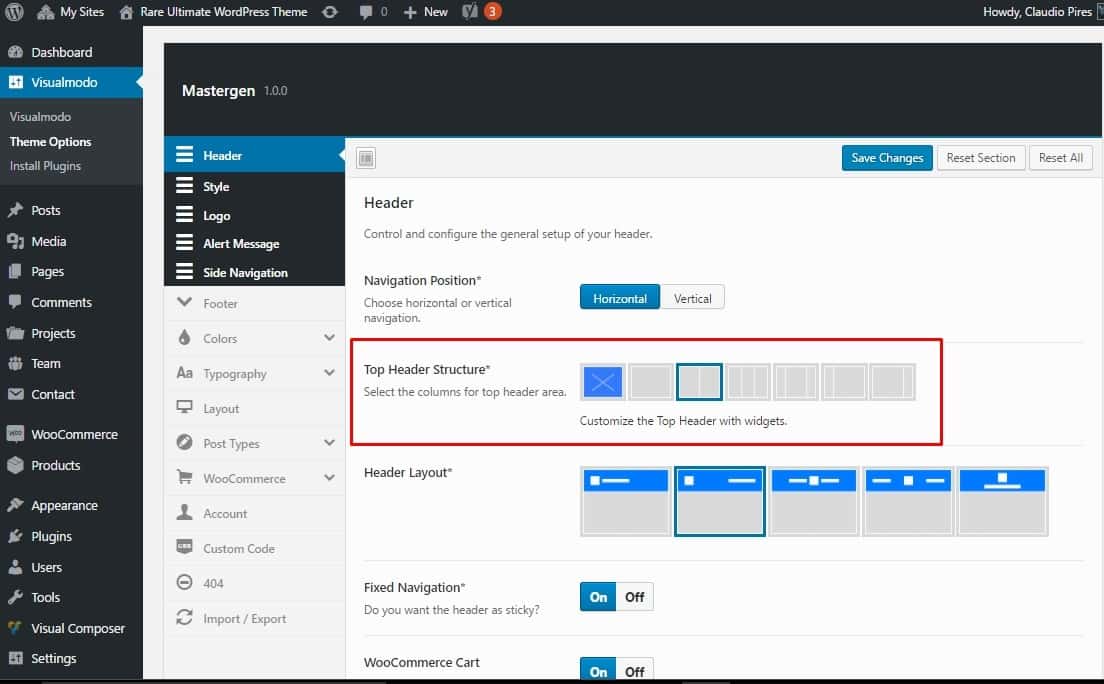
To start, you need to navigate to your WordPress dashboard > Visualmodo > Themes Options > Header > Top Header > and set it to appear on desktops, mobiles, or both. Select the layout you want for the structure of the columns.
In the attached image, we use 2 columns with ‘Visualmodo contact info’ and the ‘Visualmodo social icons’ widgets. NOTE: Select the X options if you don’t want this top header section over your default navigation menu. To finish, click on the ‘Save Changes button.
How to add widgets to it?

Go to your WordPress dashboard penal > Appearance > widgets > and select a widget. (by dragging) and drop this widget on the ‘top header’ position widgets tab. Like it’s on the image above. You also can add a navigation menu in this area using the ‘Visualmodo menu’ widget to call a menu page in this area, as is shown in the image below.

Adding Widgets on WordPress Top Header – Visualmodo
How To Add Widgets On WordPress Top-Header?
In addition, we have made a video tutorial for our YouTube channel. It shows the usage and placement of the widget so you can see the process entirely. Please watch it so you can reproduce it on your site.
Keep reading this guide & tutorial to learn how to use WordPress widgets, create and start adding blocks to website top header navbar section in a simple method.
Video Tutorial
Adding Widgets on WordPress Top Header Using Any Other Themes (Alt Options)
To add widgets to the top header area in WordPress, you’ll typically need to modify your theme’s code or use a plugin that provides header customization options. Here’s a general guideline on how you can achieve this:
- Determine the header area: Identify where you want to add the widgets in your theme. This could be in the theme’s header.php file or a particular template file related to the header.
- Access your WordPress files: You can access your WordPress files through an FTP client or using a file manager provided by your hosting provider. Locate the theme files within the “wp-content/themes” directory.
- Create a child theme (optional): It’s recommended to create a child theme before modifying your theme’s files. This ensures that your changes won’t be lost when you update the parent theme. If you already use a child theme, proceed to the next step.
- Locate the header file: Look for the appropriate file where you want to add the widgets. Common file names include header.php, header-xxx.php, or similar variations.
- Edit the header file: Open the header file for editing. Add the necessary PHP code to display the widget area where you want it to appear. This can be done using WordPress’ dynamic sidebar function,
dynamic_sidebar(). For example, you can use the following code snippet:
Custom Code
<?php if (is_active_sidebar('top-header-widget-area')) : ?>
    <div class="top-header-widgets">
        <?php dynamic_sidebar('top-header-widget-area'); ?>
    </div>
<?php endif; ?>
In this example, we assume you want to create a widget area named ‘top-header-widget-area’ and display it within an <div> element with the class ‘top-header-widgets’. You can modify the class and other HTML elements to suit your theme’s design for adding navbar blocks WordPress.
- Register the widget area: To make the ‘top-header-widget-area’ available for use, you need to register it in your theme’s functions.php file or an appropriate file where the theme registers sidebars. Add the following code snippet to register the widget area:
Code Part 2
function theme_register_widget_areas() {
    register_sidebar(array(
        'name' => 'Top Header Widget Area',
        'id' => 'top-header-widget-area',
        'description' => 'Widgets in this area will be displayed in the top header.',
        'before_widget' => '<div id="%1$s" class="widget %2$s">',
        'after_widget' => '</div>',
        'before_title' => '<h4 class="widget-title">',
        'after_title' => '</h4>'
    ));
}
add_action('widgets_init', 'theme_register_widget_areas');
This code registers the widget area with the specified name, ID, and description. You can customize the ‘before_widget’, ‘after_widget’, ‘before_title’, and ‘after_title’ values to match your theme’s markup.
- Save your changes: Once you’ve added the code to the appropriate files, save them, and upload them back to your WordPress installation.
- Add widgets to the new area: In your WordPress dashboard, go to “Appearance” -> “Widgets.” You should now see the newly created widget area available in the list of available widget areas. Drag and drop desired widgets into the ‘Top Header Widget Area.’
- Preview and adjust styling: Visit your website’s front end to see the changes. You may need to adjust the CSS styles in your theme’s stylesheet to ensure the widgets appear as desired within the top header area.
Note: If you’re uncomfortable modifying code, you can also explore plugins like “Header and Footer Scripts” or “Custom Header Extended” that offer more user-friendly options for adding widgets